So the anticipation was that much greater this morning. I got up, poured a cup of coffee, said hello (and goodbye) to Bob and headed downstairs to my beer. I can't tell you how excited I was when the specific gravity read the same as yesterday - 1.020. I had been given a green light!
So, I started by sanitizing all the equipment I'd be using - the bottling bucket, the siphon tube and hoses, bottles, bottle caps, even my bottle tree. This is probably the step I like least but one that can ruin your whole batch if omitted or not done properly.
Next, I boiled the corn sugar mixture - this is to be added to the beer once it starts flowing into the bottling bucket.
Since I needed to siphon the beer from the fermentation bucket to the bottling bucket, I set the bottling bucket on the floor so it would be lower than the beer level.
Sorry I didn't get any pictures of the siphoning process but I had my hands full at the time. I couldn't rest the siphon tube in the bottom of the beer since there is a heavy layer of sediment on the bottom and I didn't want to siphon that up with the beer. So, I had to hold the siphon hose the whole time so that the tip was always below the level of the beer but just above the layer of sediment. It wasn't so bad though. It actually went a lot faster than anticipated.
Once the beer started flowing into the bottling bucket, I added the corn sugar mixture. This is a very important step in that without it, the beer would be very flat.
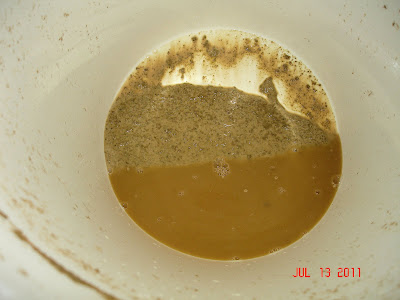
It was recommended that a small amount of beer be left in the bottom so as not to risk pulling up the sediment. I probably left more than I needed, but why take a chance. Not that it would hurt anything to get a little sediment in your beer - it's just largely yeast and hop residue. Craig on YouTube says a little sediment in your beer just proves it's a natural beer!
 |
| Still, it's not very pretty! |
 |
| Thankfully, the beer looks a lot better. Smells pretty good too! |
Next came the bottling...
I raised the bottling bucket off the floor onto the table and then attached my bottle filler tip to the spigot via a long flexible tube. The bottle filler tip is a neat gadget that when inserted into the bottle and pushed down lightly on the bottom of the bottle, the beer begins to flow, and then when the tip is lifted off the bottom, the beer flow stops. Makes it really easy!
 |
| Not the most flattering picture, but... I'm down in the basement brewing beer, for Pete's sake! |
I actually tasted the last little bit of beer that was left in the bottling bucket. It wasn't bad, just a little flat. That's because it's not yet carbonated. Hopefully, in about three weeks, there won't be anything flat about this beer!
Anyway, the last step was capping each bottle - much easier than I would have guessed. This really neat bottle capper came with my beer kit. I only messed up one cap out of 49. Not bad for a rookie!
Now! The beer just needs to stay in a cool dark place for 3 more weeks. Then a taste test! Hope I can wait!
Oh! One more thing,,,Happy Birthday Mom! I still miss you!


That's so awesome. Even I can't wait the 3 weeks to see how you like it. Save one and bring it here when you visit. Good for you, Judy. You did it!
ReplyDelete